

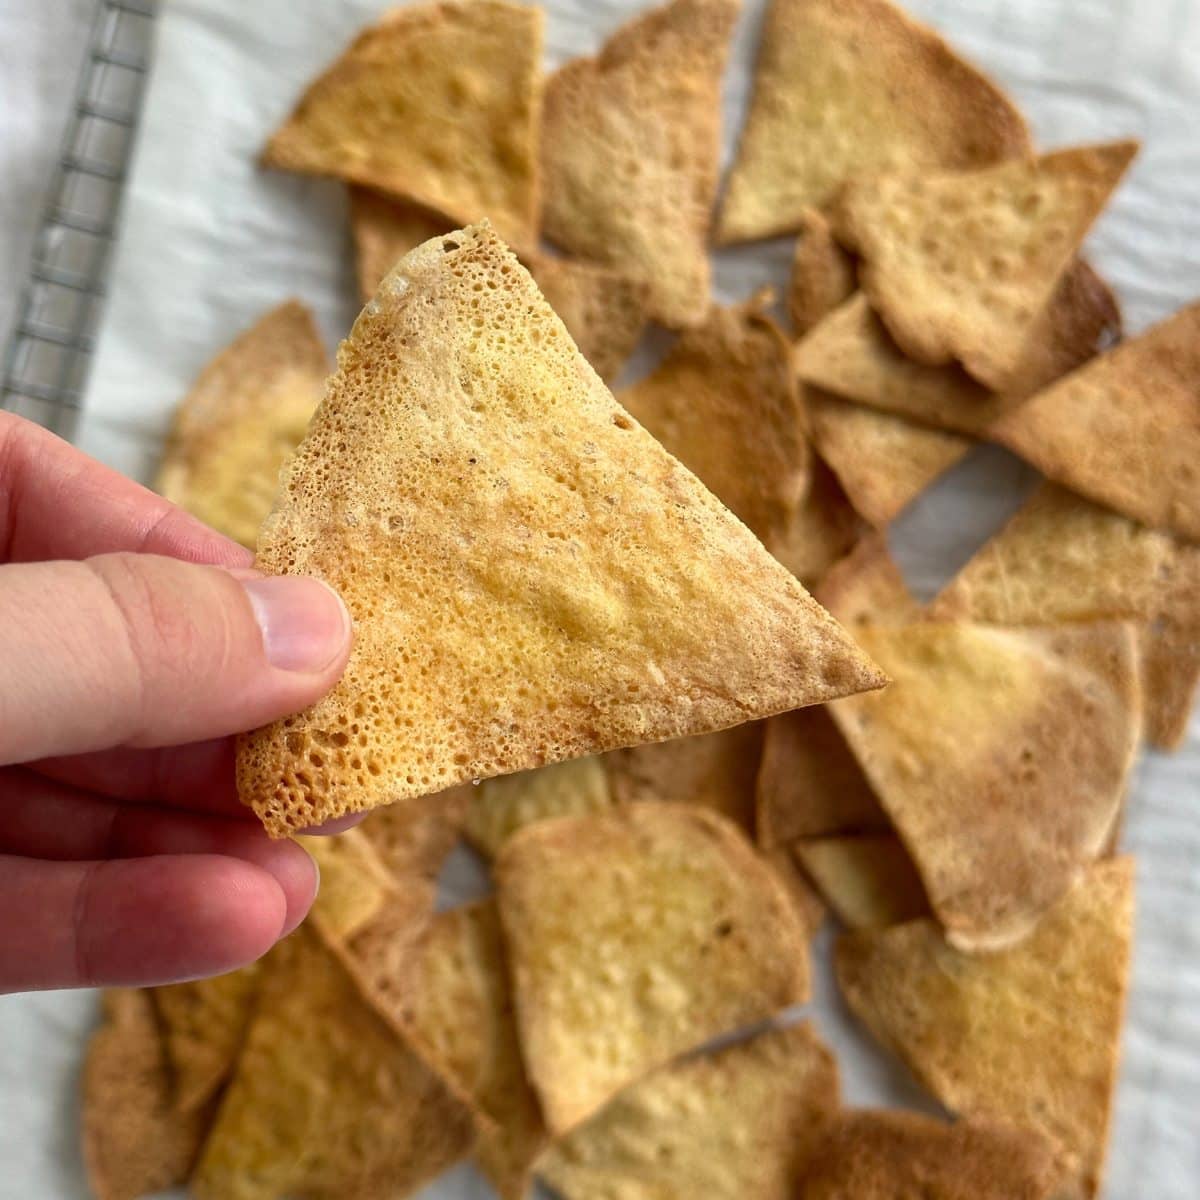
Thin and crispy chickpea chips pair perfectly with any dip or sauce. Slice gluten-free chickpea flour tortillas into triangles, brush with olive oil, sprinkle with sea salt, and bake to perfection in the oven.
Want to save this recipe?
Plus more tasty vegan recipes every week. Unsubscribe at any time.
I love cutting corn or flour tortillas into triangles and baking them to make homemade chips. One day I thought to myself, why not try the same thing with chickpea flour tortillas?
I added a mix of my favorite seasonings to the tortilla batter so each bite has a delicious, savory taste. Needless to say, chickpea tortilla chips have quickly secured a spot as one of my favorite snacks.
I like to dip these gluten-free chips into chickpea chicken salad and cauliflower ceviche. They also make a great crunchy salad topping when you cut them into strips.
Ingredient Notes
To make chickpea chips, you will need these simple ingredients:
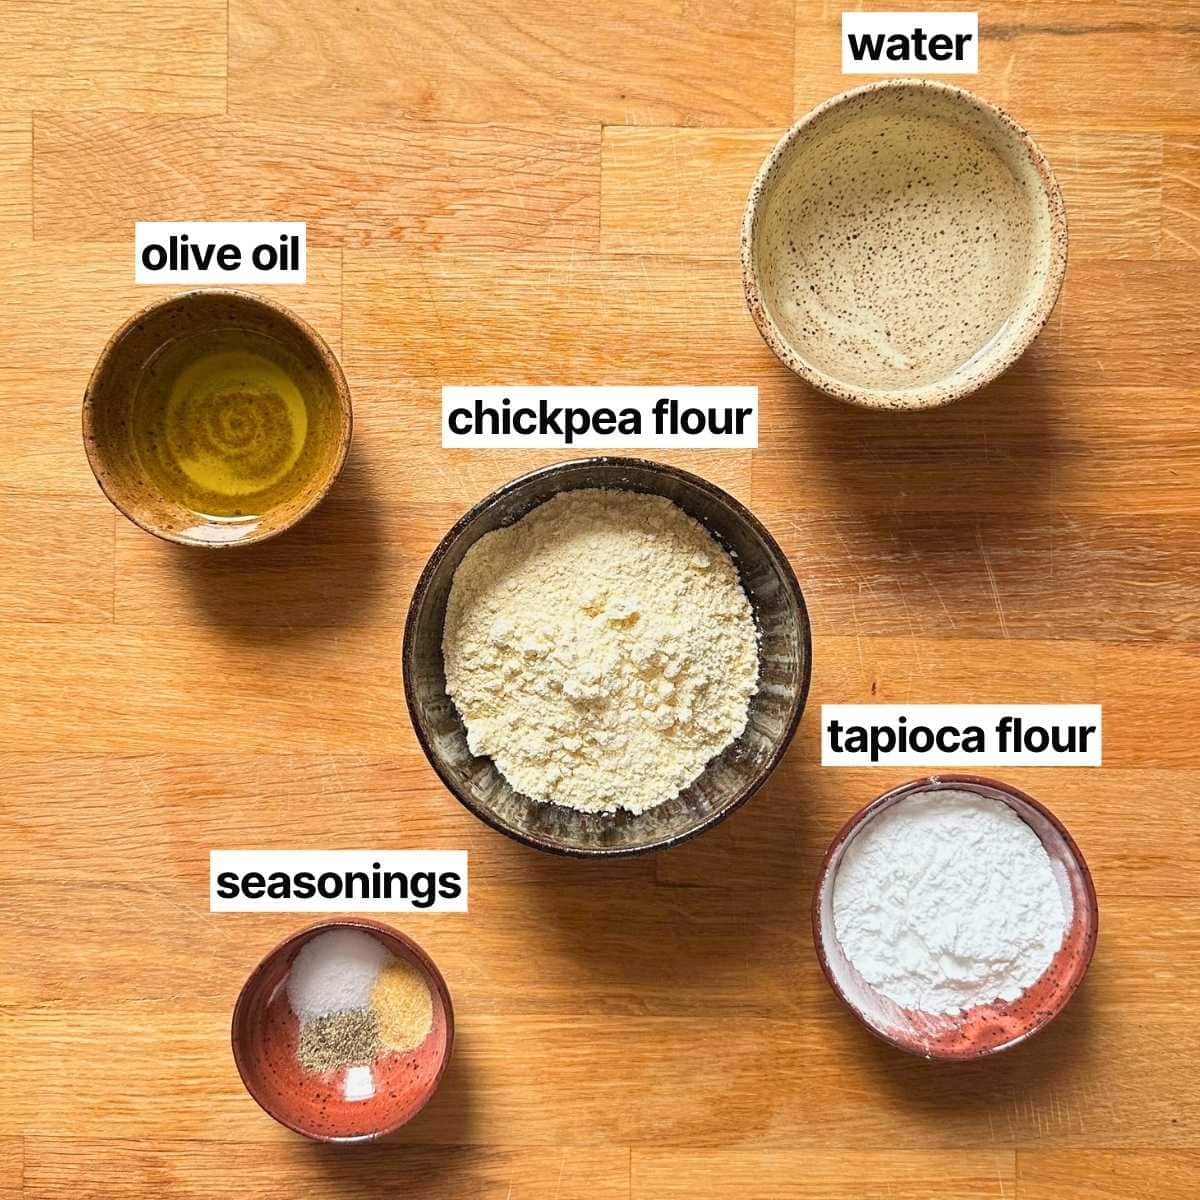
Chickpea flour AKA garbanzo bean flour, gram flour, or besan flour, is the main ingredient. This flour is just ground chickpeas, so you could even make it at home! This recipe also works well with fava bean flour.
Originally I also used tapioca flour as it makes the tortillas a bit more flexible. But, it's not crucial to the success of this chips recipe. Just substitute the same amount of chickpea flour.
A mix of garlic powder, onion powder, salt, and pepper enhance the savory taste from the chickpeas. Without a good seasoning mix, these chips are pretty plain.
Other herbs, spices, or even nutritional yeast are all tasty additions. Play around, it's up to you!
The recipe card below includes the full list of ingredients + instructions.
How to Make Chickpea Chips
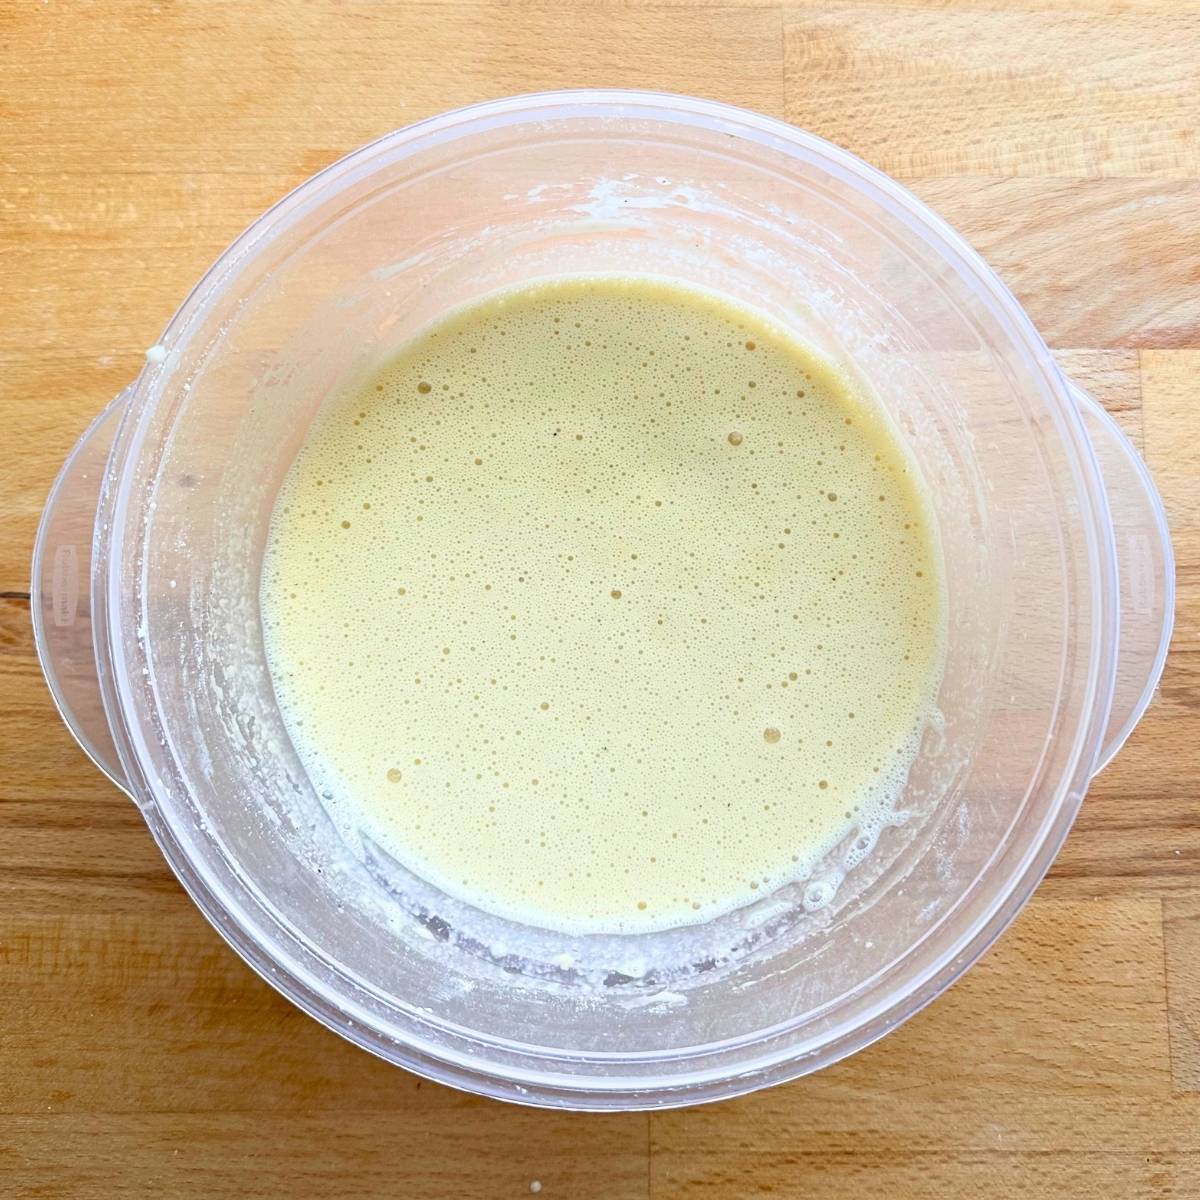
- Whisk together chickpea flour, seasonings, and water to form a runny, pourable batter. You can always add more water, if needed.
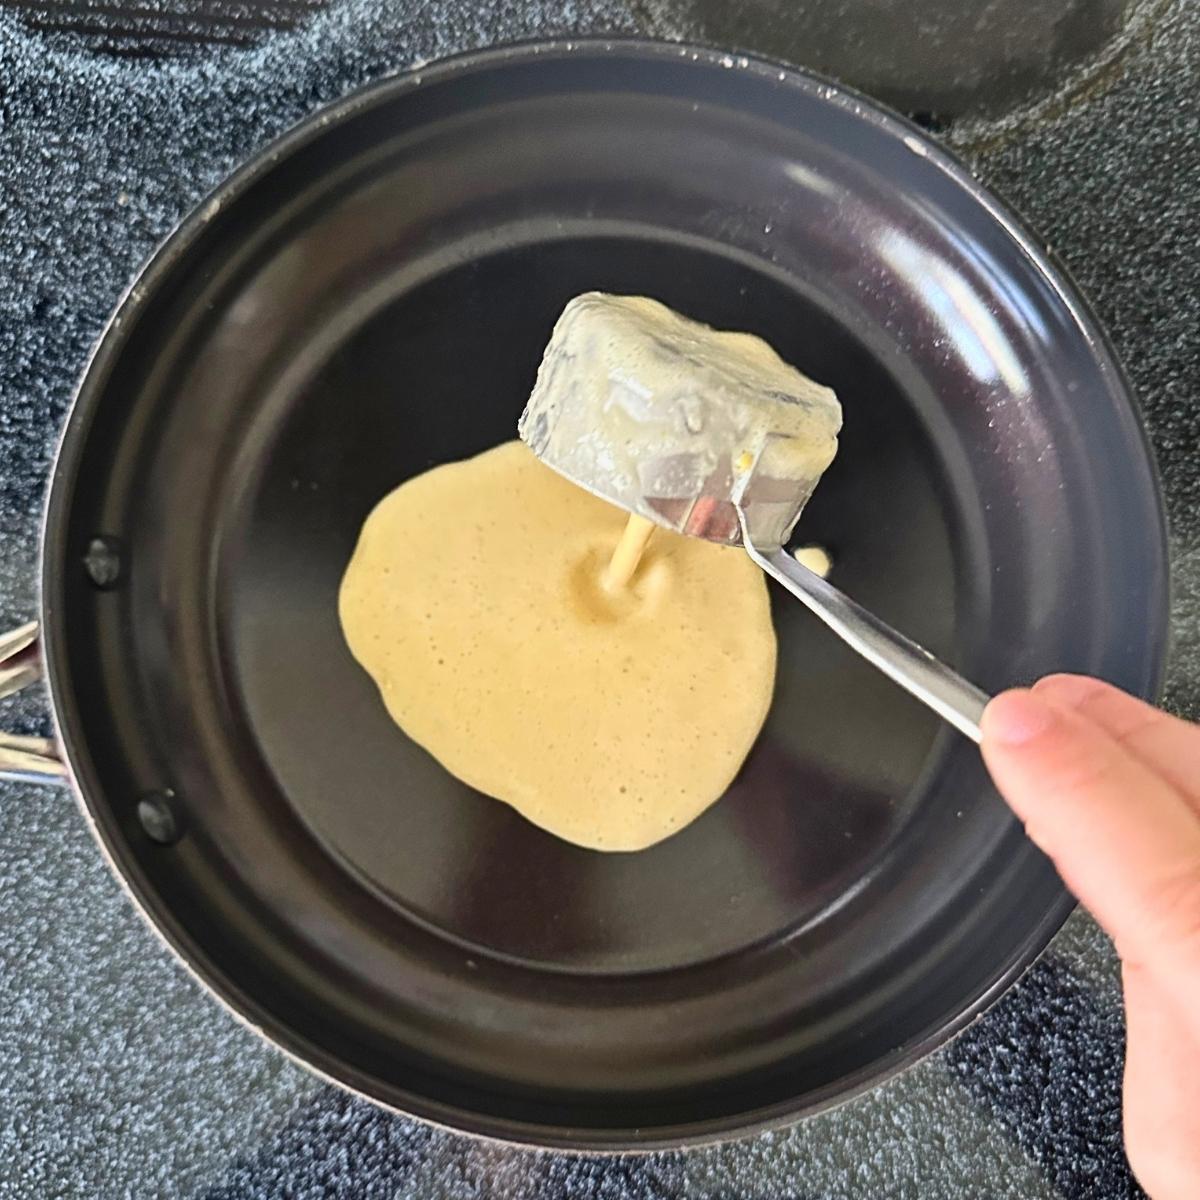
- Pour batter into a pan and tilt it at about a 25° angle. Quickly swirl the batter into a circle to spread it as thin as possible.
The process for making the tortillas takes some time to get the hang of. The post for chickpea flour tortillas provides more detail.
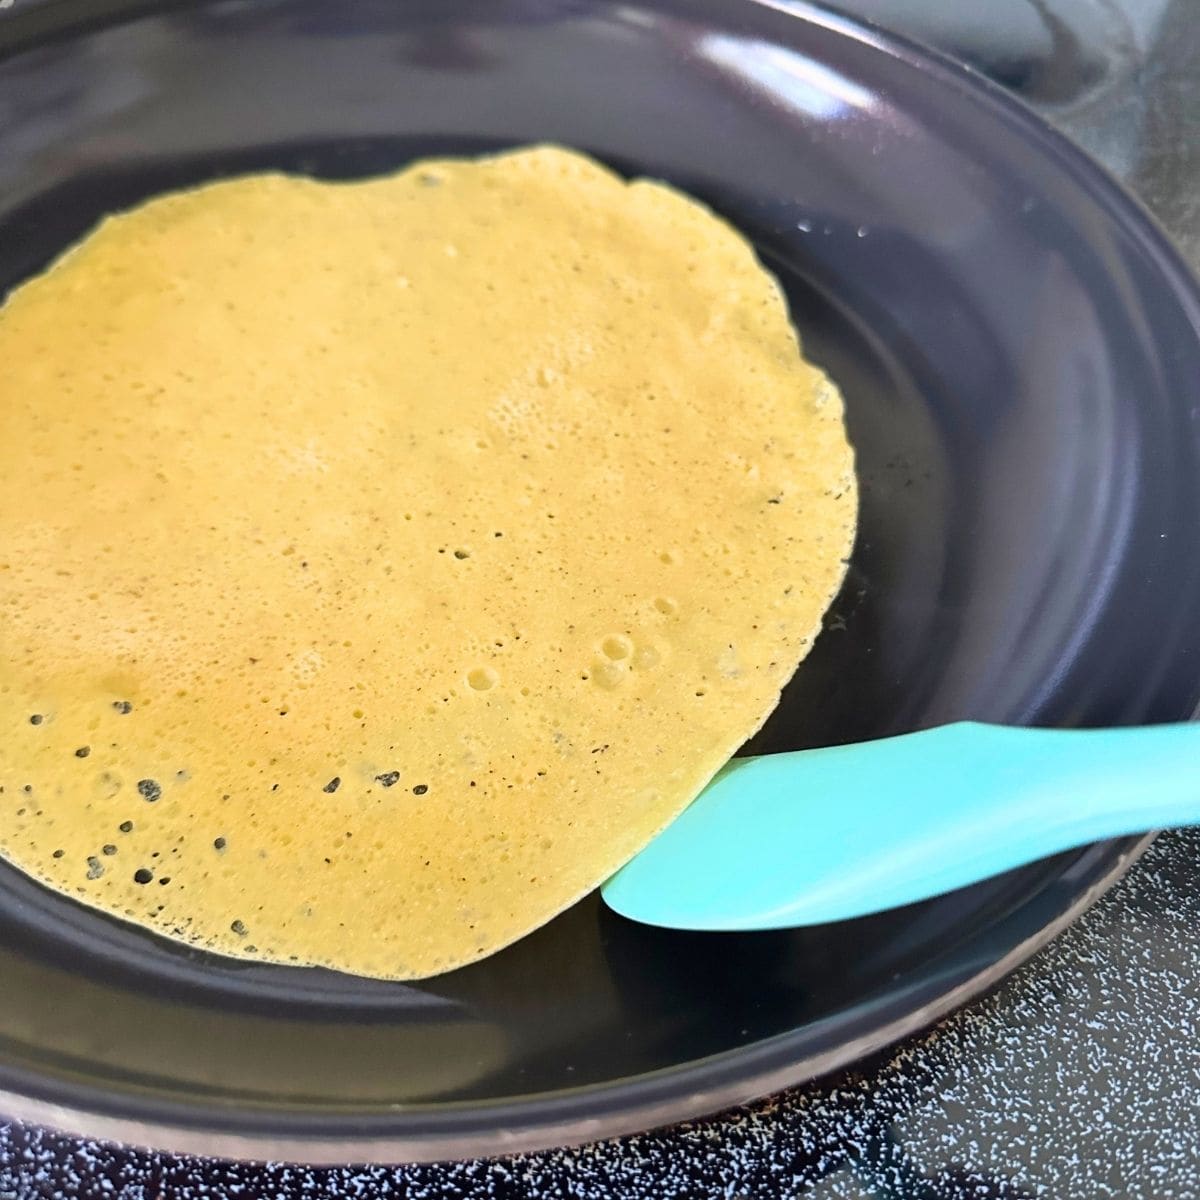
- Cook until the edges of the tortilla release from the pan. Flip to cook the other side.
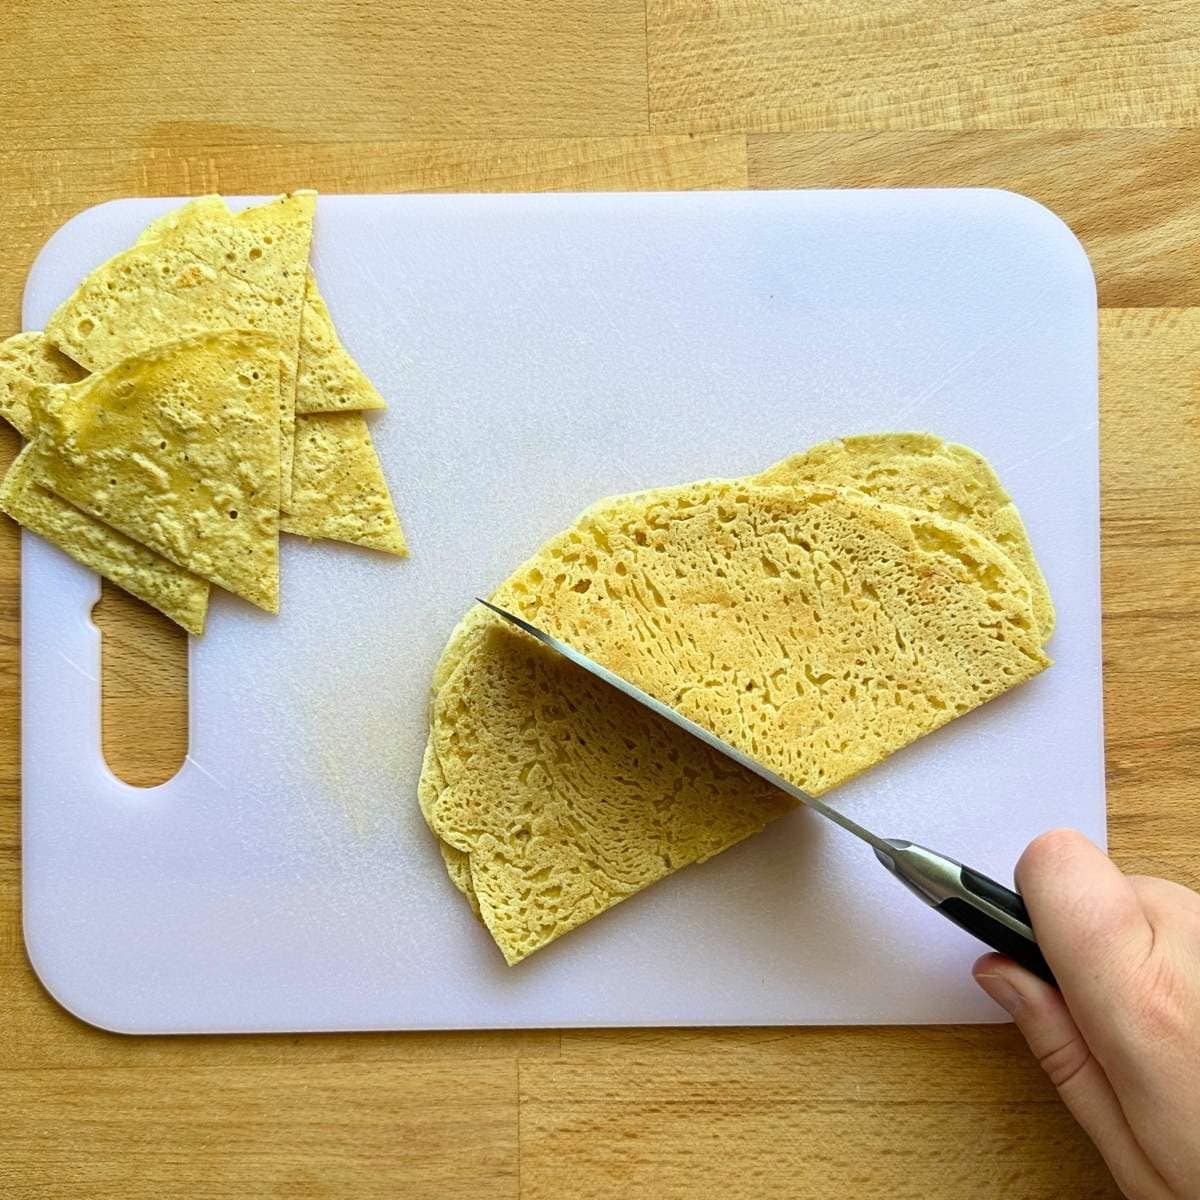
- Allow the tortillas to cool on a wire rack before cutting each tortilla into 6 triangles.
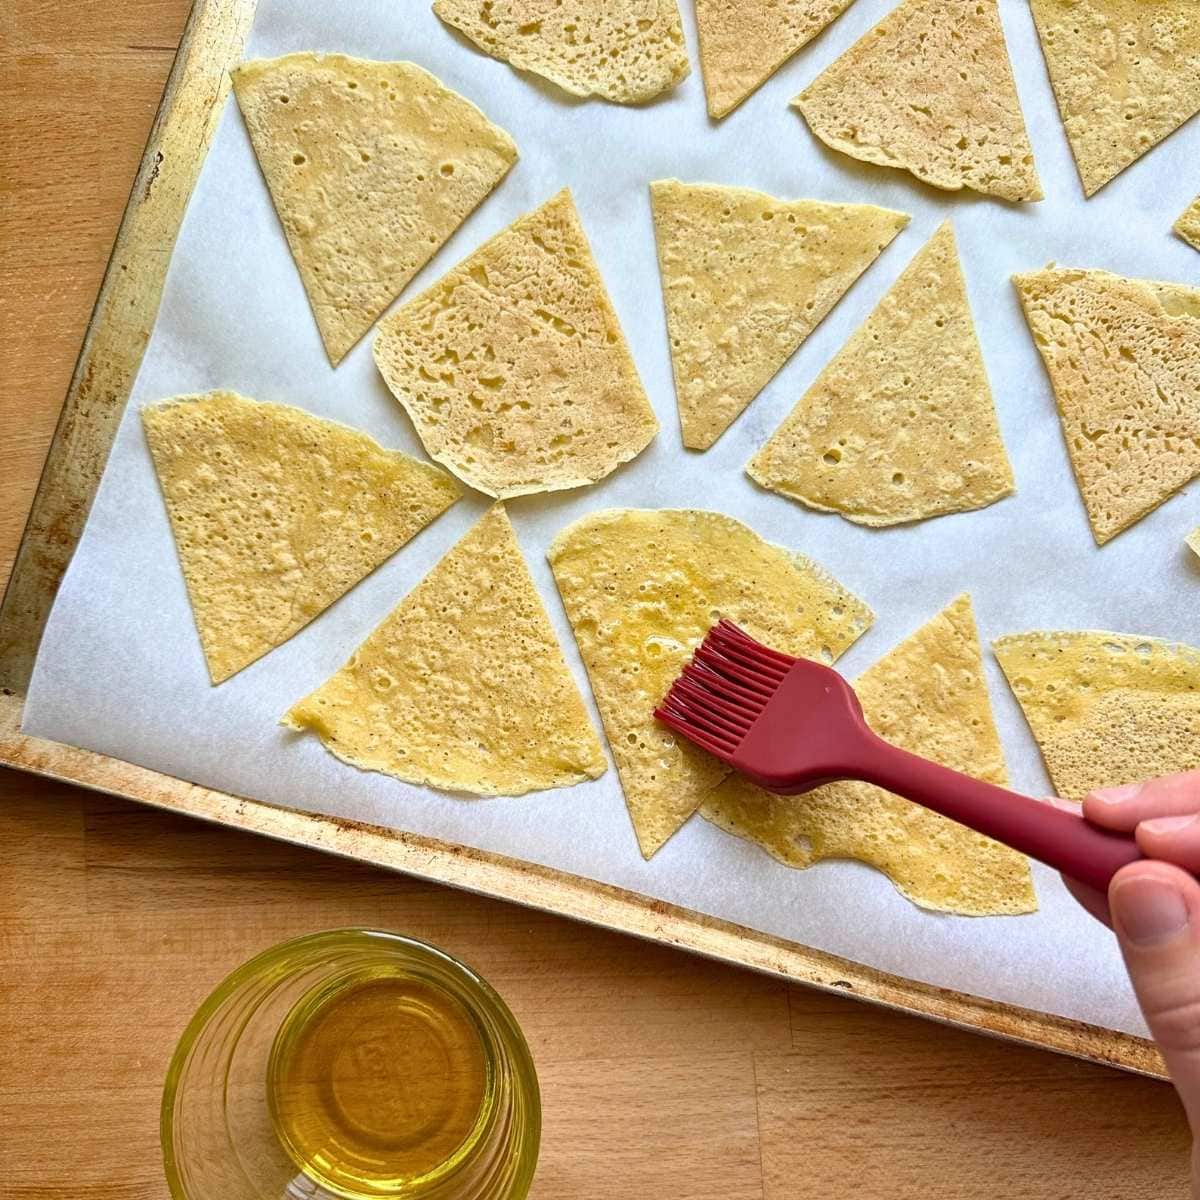
- Spread the chips in a single, even layer on a baking sheet and brush each side with olive oil.
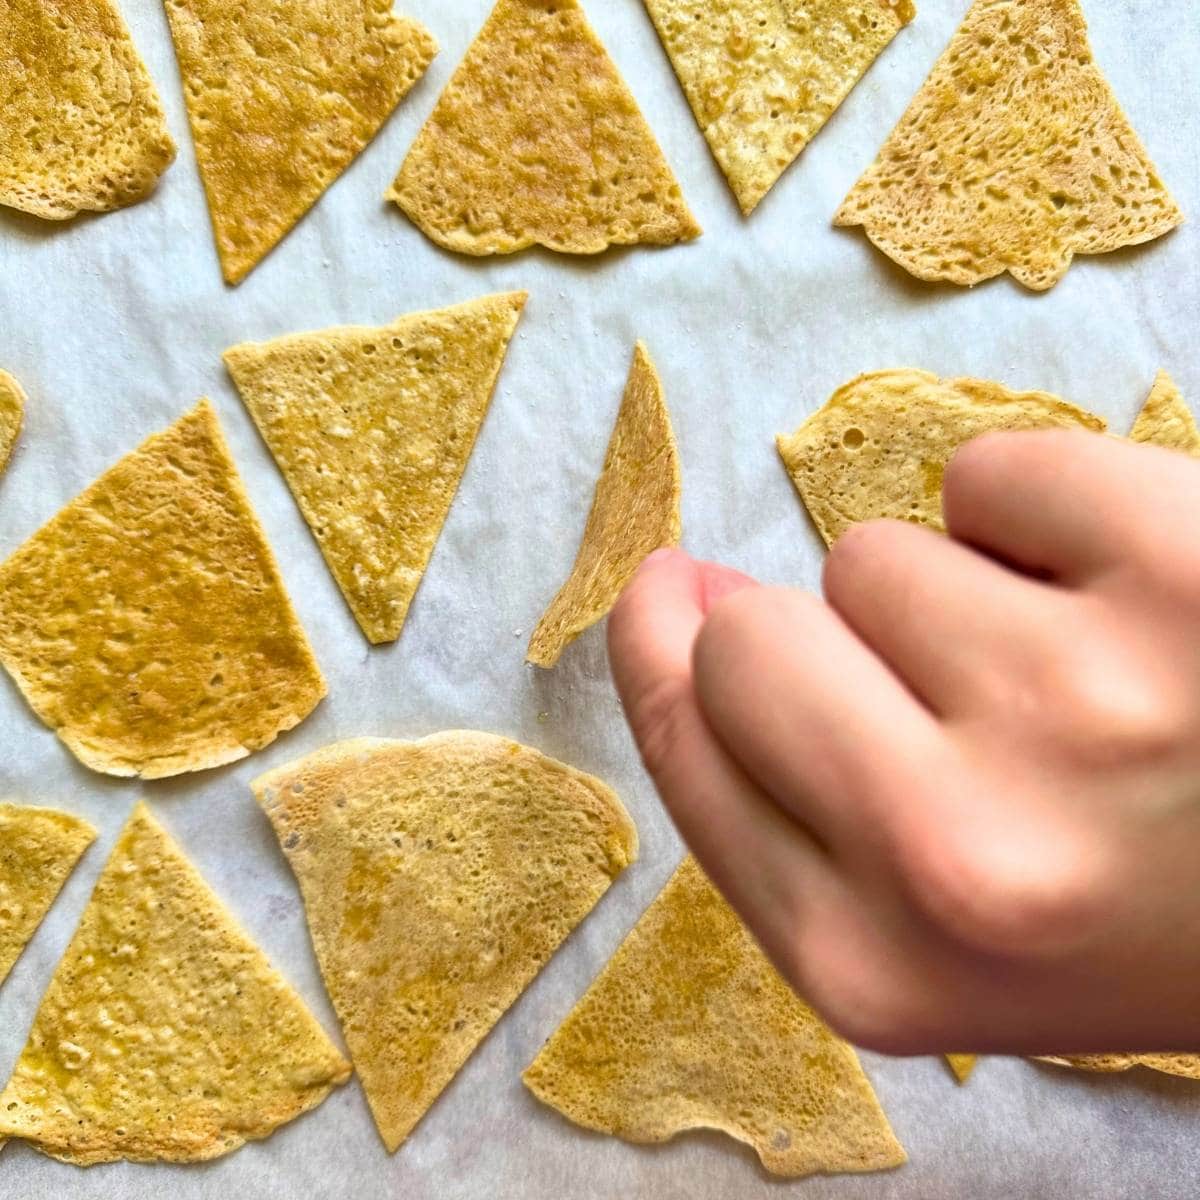
- Bake the chips in the oven. Halfway through cooking flip them.

- Finish baking until they are golden and crispy. Enjoy with your favorite dip!
Ways to Serve
These homemade tortilla chips make for a great snack when served with:
Want more tasty vegan recipes sent to your inbox?

Chickpea Chips (Homemade Tortilla Chip Recipe)
Ingredients
- 1 cup chickpea flour
- ½ cup tapioca starch see note
- ½ teaspoon fine sea salt more for sprinkling on top
- ¼ teaspoon black pepper
- ½ teaspoon garlic powder
- ½ teaspoon onion powder
- 1 ⅓ cup water more if needed to thin
- 2 tablespoons olive oil
Instructions
- Whisk 1 cup chickpea flour, ½ cup tapioca starch, ½ teaspoon fine sea salt, ¼ teaspoon black pepper, ½ teaspoon garlic powder, and ½ teaspoon onion powder in a medium sized bowl.
- Add 1 ⅓ cup water and whisk to form a smooth, liquidy batter that is easy to pour.
- Preheat a large pan to medium heat. Unless your pan is non-stick, lightly oil it so the tortillas can release easily.
- Pour ¼ cup of batter into the pan. Quickly pick up the pan, tilting it at a 25° angle, and swirl the batter into a circle, spreading it as thin as possible.
- Return the pan to the stove and allow the tortilla to cook for a couple of minutes or until lightly browned on the underside. The edges of the tortilla should start to release from the pan.
- Flip the tortilla and cook another 1 to 2 minutes until golden brown.
- Repeat to cook 10 6" tortillas. Add more olive oil to the pan as needed.
- While you're cooking the tortillas, place a clean metal baking sheet into the oven. Preheat the oven to 400°F.
- Allow the tortillas to cool for 5 to 10 minutes on a wire rack before making them into chips.
- Cut each tortilla into 6 triangles with a pizza cutter or sharp knife. This recipe makes 60 chips total.
- Brush each side of the tortilla with olive oil and sprinkle with extra salt.
- Carefully remove the preheated baking sheet from the oven. Place the chips on the baking sheet in a single, even layer. Make sure the chips aren't touching or overlapping.
- Bake the chickpea chips for 7 minutes at 400°F and then flip each chip over.
- Bake for an additional 5 to 7 minutes or until the chips look crispy and golden brown. Enjoy!
Notes
Email me the recipe!
Plus more tasty vegan recipes every week. Unsubscribe at any time.
* The provided nutritional information is an estimate per serving. Accuracy will vary on specific ingredients and brands used.


Marjory says
I love these chips, not only the easy to make, but I love that they are higher in protein and fiber. And the seasoning is perfect.
Sarah Pilley says
I'm so glad you enjoyed Marjory! The seasoning is my favorite too ☺️